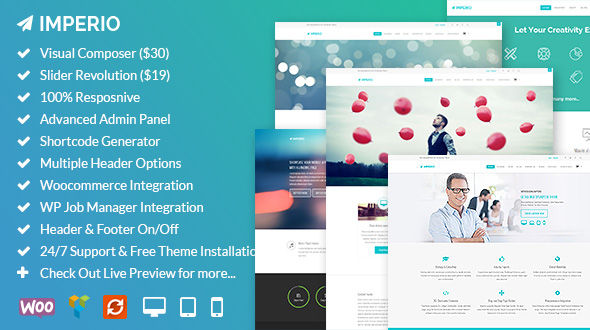


Imperio is a Multipurpose Responsive WordPress Theme. Create Unlimited complex pages easily with the advanced features. Advanced Theme Options Panel, Shortcodes Generator, Visual Composer, Unlimited Widgets, Custom Widgets, Custom Post Type, Multiple Header, Google Fonts, WIA-ARIA Enabled, SEO Optimized, Free Updates & 24/7 Support and many more. Check Out all the features listed below.
Top Features
- Twitter Bootstrap 3.0
- Ultra Responsive
- Advanced Admin Panel
- Revolution Slider
- Flexslider
- Isotope
- Responsive Lightbox
- Visual Composer
- 12 Header Options
- Dark and Light Headers
- Sticky Header
- Social Settings
- Unlimited Colors
- Typography Options
- Layout Options
- Portfolio Layouts
- 404 Page Option
- Footer Options
- WordPress Post Formats
- Woocommerce Integration
- Custom Widgets
- Boxed Layout
- Custom Background
- Custom Page Headers
- Boxed and Fullwidth per page/post
- Unlimited Sidebars
- Retina Ready
- Demo Content
- Shortcode Generator
- Customer Support
- Translation Ready
- Social Share Buttons
- Animated Elements
- Fontawesome Icons
- Clean Code
- WP Job Manager Integration
- Custom Post Types
- Yoast SEO Support
- Responsive Pricing Tables
- WIA-ARIA Support
Theme Options Panel
Imperio comes with a intense and advanced theme options panel. By changing the settings you can create different variations of layouts and designs for your website.
Here is a List of all the Theme Options Features:
General Settings
Control and configure the general setup of your theme. Setup your icons, email address and insert your analytics tracking code.
- Enable Image Logo – Enable/Disable
- Custom Logo Upload – Upload your logo.
- Custom favicon Upload – Upload a custom favicon for your site.
- Apple iPhone Icon Upload – Icon for Apple iPhone (57px x 57px).
- Apple iPhone Retina Icon Upload – Icon for Apple iPhone Retina Version (114px x 114px)
- Apple iPad Icon Upload – Icon for Apple iPhone (72px x 72px)
- Apple iPad Retina Icon Upload – Icon for Apple iPad Retina Version (144px x 144px)
- Enter Custom Tagline – This will appear in the topbar left above the logo. Else it will display the Blog Tagline.
- Tracking Code – Paste your Google Analytics (or other) tracking code here. This will be added into the footer template of your theme.
Boxed Layout Options
- Boxed Layout – Enable / Disable
- Background Color – Pick background color for the boxed layout.
- Background Image – Upload large background image or pattern image for the boxed layout.
- Enable Predefined Background Pattern Selection – Enable to use predefined background pattern from below Select Background Pattern Section.
- Select Background Pattern – We have 25 predefined patterns ready for use. To use this option please make sure the above background image field is blank. (Click Remove Button to clear the custom background image.)
- Background Repeat – Do you want your background to repeat? Please make it repeat when using small pattern image.
- Background Position – Select background image alignment. This is useful when background repeat is disabled.
- Background Attachment – Would you prefer your background to scroll with your site or be fixed and not move.
- Background Image Resize – Enable this to have your background image always fit to the document width and height no matter what size screen the user has. Enable it once to check how it looks. (Do not use when using pattern image background.)
Header Options
- Show Top Sidebar Widget above Header – Check this to enable the Floating Top Sidebar Widget Area above header.
- Top Sidebar Widget Column – Select number of columns for the Top Sliding Sidebar Widget area above Header.
- Sticky Header – Turn On & Off the Sticky Header.
- Header Layout – Select blog content and sidebar alignment.
- Page Title Top Bottom Padding – Adjust the page title top & bottom padding. Default: 40. Note: Even if you give any amount from here, you can still add different top-bottom padding from page editor meta box. For more details check documentation.
Social Settings
Enter your social links which will shown in the header. Keep them blank to disable.
- Social Share Tools for Blog – Enable/Disable. Enable this to display the Social Media Icons on the Blog Post Pages
- Social Media Buttons for Portfolio – Enable/Disable. Enable this to display the Social Media Icons on the Portfolio Details Page.
- Social Media Buttons for Woocommerce – Enable this to display the Social Media Icons on the Product Details Page.
- RSS
- Dribbble
- Flickr
- Google+
- Vimeo
- Youtube
- Skype
- Github
Color Options – All colors can be select from a Color Picker.
- Accent Color – Pick an accent color for this theme.
- Body Text Color – Pick the default body text color for this theme.
- Top Floating Widget Panel & Footer Panel Text Color – Pick a color for the darker background area.
- Page Title Header Background Gradient Color Selection.
- Left Color of Gradient
- Right Color of Gradient
- Pagination Background Gradient Color Selection.
- Left Color of Gradient
- Right Color of Gradient
- Default Button Background Color (Flat or Gradient)
- Flat Color for Default Button
- Left Color of Default Gradient Button
- Right Color of Default Gradient Button
- Input Button Background Color (Flat or Gradient)
- Flat Color for Default Button
- Left Color of Default Gradient Button
- Right Color of Default Gradient Button
- Custom CSS – Quickly add some CSS to your theme by adding it to this block.
Typography Options
- Custom Google Font for Body Text – Enable/Disable
- Load Google Font Family | Weight | Style – Enter the Google Font Family Name, Font Weight, Style. e.g. fonts.googleapis.com/css?family=Roboto:400,400italic,500′. For more check the documentation.
- Define Google Font Family – Enter the Google Font Family Name Format. e.g. font-family: ‘Roboto’, sans-serif;
- Enter Google Font Weight Value – Enter the Google Font Weight. e.g. 300 or 400 or 500′
- Enter Google Font Style – Normal | Italic
- Body Font Size – Select Google Font Size for Body.
- Enter Google Font Line Height
- Custom Google Font for Standard Page Title Text – Enable/Disable
- Load Google Font Family | Weight | Style – Enter the Google Font Family Name, Font Weight, Style. e.g. fonts.googleapis.com/css?family=Roboto:400,400italic,500′. For more check the documentation.
- Define Google Font Family – Enter the Google Font Family Name Format. e.g. font-family: ‘Roboto’, sans-serif;
- Enter Google Font Weight Value – Enter the Google Font Weight. e.g. 300 or 400 or 500′
- Enter Google Font Style – Normal | Italic
- Select Text Case – Select Text Case. Capitalize | Uppercase | Lowercase
- Body Font Size – Select Google Font Size for Body.
- Custom Google Font for Heading Texts – Enable/Disable
- Load Google Font Family | Weight | Style – Enter the Google Font Family Name, Font Weight, Style. e.g. fonts.googleapis.com/css?family=Roboto:400,400italic,500′. For more check the documentation.
- Define Google Font Family – Enter the Google Font Family Name Format. e.g. font-family: ‘Roboto’, sans-serif;
- Enter Google Font Weight Value – Enter the Google Font Weight. e.g. 300 or 400 or 500′
- Enter Google Font Style – Normal | Italic
- Select Text Case – Select Text Case. Capitalize | Uppercase | Lowercase
- Custom Heading Font Attributes. – Enable/Disable – Enable this option to be able to change font size, line height, top margin and bottom margin for all individual headings (h1, h2, h3, h4, h5, h6).
- Select the font size, line-height, margin-top, margin-bottom for Heading #1.
- H1 Font Size
- H1 Line Height
- H1 Top Margin
- H1 Bottom Margin
- Select the font size, line-height, margin-top, margin-bottom for Heading #2.
- H2 Font Size
- H2 Line Height
- H2 Top Margin
- H2 Bottom Margin
- Select the font size, line-height, margin-top, margin-bottom for Heading #3.
- H3 Font Size
- H3 Line Height
- H3 Top Margin
- H3 Bottom Margin
- Select the font size, line-height, margin-top, margin-bottom for Heading #4.
- H4 Font Size
- H4 Line Height
- H4 Top Margin
- H4 Bottom Margin
- Select the font size, line-height, margin-top, margin-bottom for Heading #5.
- H5 Font Size
- H5 Line Height
- H5 Top Margin
- H5 Bottom Margin
- Select the font size, line-height, margin-top, margin-bottom for Heading #6.
- H6 Font Size
- H6 Line Height
- H6 Top Margin
- H6 Bottom Margin
Layout Options
- Blog Layout – Select blog content and sidebar alignment. Full Panel | Right Sidebar | Left Sidebar
- Single Post Layout – Select single post layout for blogs. Full Panel | Right Sidebar | Left Sidebar
- Team Page Layout – Select team listing page column style. 4 Column | 3 Column
- Page Layout – Select default page content and sidebar alignment.
- Pagination Style – Numeric | Older Posts/Newer Posts Button
Portfolio Options
- Single Portfolio Layout – Choose any Layout for Portfolio Item Listing Page.
- Boxed | 4 Column | Bottom Title
- Boxed | 3 Column | Bottom Title
- Boxed | 4 Column | Inside Title
- Boxed | 3 Column | Inside Title
- Full Width | 4 Column | Bottom Title
- Full Width | 3 Column | Bottom Title
- Full Width | 4 Column | Inside Title
- Full Width | 3 Column | Inside Title
- Masonry | Boxed | 4 Column | Bottom Title
- Masonry | Boxed | 3 Column | Bottom Title
- Masonry | Boxed | 4 Column | Inside Title
- Masonry | Boxed | 3 Column | Inside Title
- Masonry | Full Width | 4 Column | Bottom Title
- Masonry | Full Width | 3 Column | Bottom Title
- Masonry | Full Width | 4 Column | Inside Title
- Masonry | Full Width | 3 Column | Inside Title
- List | Boxed | 2 Column | Side Title
- Timeline List | Boxed | 2 Column | Side Title
- Single Portfolio Prev/Next Link – Enable/Disable
- Back to Portfolio Listing Page Link – Enter your the portfolio landing page link. (Ex: http://example.com/portfolio/) This link will be used in the Single Page Navigation “Back to Portfolio Page” Link in the Banner Area. Keep it blank to disable.
- Custom Portfolio Slug – If you want your portfolio post type to have a custom slug in the url, please enter it here. You will still have to refresh your permalinks after saving this! This is done by going to Settings > Permalinks and clicking save.
404 Page Option
- Main Error Message – Keep this field blank to use the default text. Note: HTML is allowed.
- Help Message – Add some text to help the user navigate from this error page. Keep this field blank to use the default text. Note: HTML is allowed.
- Quick Search Form – Enable this to show the wordpress search form in this page.
- Some Extra Content – This content will be displayed at the bottom container of 404 pages. Keep this field blank to use the default text. Note: HTML is allowed.
- Blog Page URL – Update your Blog Page URL. This link will help the visitor to navigate to your blog page easily. Default Blog URL: www.yoursite.com/blog/
- Contact Us Page URL – Update your Contact Page URL. This link will help the visitor to navigate to your contact page easily. Default Contact Page URL: www.yoursite.com/contact-us/
Footer Options
- Show Footer Widget Section – Check this to enable Footer Widget Section. If this is enabling this option please select amount of column to be shown in the section bottom.
- Footer Column – Select Footer Widget Column Count.
- WP Nav Menu in Footer – Check this to enable Footer Menu in Footer Bottom Section.
- Footer Copyright Text – Adding any text or HTML will replace the default Footer Content.
- Back to Top – Enable to display the Scroll To Top Element in every page. This helps the user to quickly scroll to top of the page while browsing long pages. And its the Latest Trend too!!
WooCommerce Options
- Header Quick Cart Icon Button – Enable this to display the Quick Cart Icon in the header.
- Product Listing Layout – Select Product Listing Layout for Main Shop Page, Product Category Page Listing, Product Tag Page Lisitng.
- Product Details Page Layout – Select Product Details Page Layout.
- Products Per Page – Number of products per page.
- Add to Cart Button Background Gradient Color Selection.
- Add to Cart Left Color of Gradient
- Add to Cart Right Color of Gradient
- More Details Button Background Gradient Color Selection.
- More Details Left Color of Gradient
- More Details Right Color of Gradient
Shortcode Generator
Imperio comes with inbuilt Short Generator. Any wordpress theme’s weight depends on this. Shortcodes give the theme admin extreme options and flexibility to take the website to another dimension. We have awesome collection of tailor made shortcodes for you.
Here is a list of them:
- Column
- Button
- Alert
- Highlight
- Toggle
- Tabs
- Lightbox Image
- Lightbox Video
- Image Gallery
- Single Image
- Special Heading
- Divider
- Youtube
- Vimeo
- Audio
- Video
- Soundcloud
- Progress Bar
- Progress Circle
- Counter Box
- Flex Slider
- Thumb Slider
- Checklist
- Checkhead
- Text Block
- Pricing Table
- Parallax Panel
- Recents Post Carousel
- Testimonials
- Clients
- Font Awesome Icons
Drag & Drop Page Builder
We have customized the Visual Composer Plugin to fit Imperio. Drag & Drop Page Builder is the most popular page creation tool these days. This tool is very useful for those who doesn’t want to write any single line of code.
Check Out the list of Visual Composer Items available in this theme:
- Row
- Text Block
- Divider
- Alert Box
- Single Image
- Image LIghtbox
- Video Lightbox
- Special Heading
- Font Awesome Icons
- Content Box
- Facebook Like Button
- Tweetmeme Button
- Pinterest Button
- Flex Slider
- Thumbslider
- Masonry Gallery
- Recent Posts
- Tabs
- Accordion
- Widgetized Sidebar
- Button
- Video Player
- Audio Player
- Soundcloud
- Google Maps
- Raw HTML
- Raw JS
- Youtube Video
- Vimeo Video
- Progress Bar
- Progress Circle
- Counter Box
- Contact Form 7
- Revolution Slider
- WP Search
Unlimited Sidebar
Create Unlimited Sidebars and assign them to single/multiple page/post.
Custom Post Type
Imperio comes with 3 inbuilt Custom Post Types.
- Portfolio
- Team
- FAQ
Portfolio Layouts
We have created 18 Different Layout for Portfolio. Choose any of them from the Theme Options Panel.
Woocommerce
Are you a shop owner? Do you sell Physical Goods? Or do you sell Digital Downloadable Goods? No Worries! With Imperio you can create your online shop in minutes! We have integrated Woocommerce in a very detailed manner. With Custom Layout options to be choose from the Options Panel and some awesome tools provided by Woocommerce itself you can start selling your products on the same day of setup.
WP Job Manager
Are you Business Organization or Small StartUp? Are you hiring peoples for your company? WP Job Manager is the best tool available in the market to showcase Job Listing in WordPress Site. We have Integrated this awesome plugin in Imperio. As Tool helps us to call this theme Multipurpose in true manner.
Contact Form 7
Create Unlimited Custom Forms with Contact Form 7. We have added custom styles to support this plugin as well.
Yoast WordPress SEO
SEO is one thing for any website with which you cannot take any chances of doing it wrong. So we thought it would be better if we let the experts handle the SEO Features of this theme. Thats why we have add SEO Features with the help of this plugin. We recommend users to use this plugin for any SEO related work for their website while using Imperio Theme.
Page Templates
- 100% Width
- Full Width
- Portfolio
- FAQ
- Team
- Job Listing
- Frontend Job Submission
Custom Widgets
- Contact Info
- Facebook Like Box
- Flickr PhotoStream
- Embedded Video
- Recent Portfolio
- Recent Posts with Image
- Recent Posts Title
- Social Links (Classic)
- Social Links (Retina)
Site Layout
You can select the site default frame as Boxed or Full width from the Theme Options Panel. We have also added another option for this. In every Page/post there is a meta option to select Boxed Layout or Full Width. For Example: If you the option selected in the Options Panel is Boxed Layout and if you select Fullwidth for any page/post meta option, then the entire site will be in Boxed Layout and that single page/post will be in Full width.


